
ChromaKey in Action
Turn Any Room Into a Pro Studio with Green Screen
Learn how to capture, light, and replace your background so your videos, meetings, and marketing look like they were shot on a Hollywood set—even if you filmed them in your spare bedroom.
No studio required. A wall, a light, and this guide are enough.
- Perfect for online courses, YouTube, and product demos
- Impress clients with branded virtual meeting backgrounds
- Create fun, cinematic scenes with friends and family
Quick Visual: What green screen actually does.

The software removes the green and drops you into any scene: an office, a stage, or a fantasy world.
Time to value: Under 1 hour from reading this page to filming your first green screen shot.
Step-by-step
How Green Screen Works in 4 Simple Moves
You don’t need a film crew. Just follow this repeatable workflow every time you shoot.
01 · Prepare
Set up the screen
Hang or clip a green backdrop so it’s flat, wrinkle-free, and fills the frame behind you.
- Keep 3–6 ft between you and the screen
- Avoid wearing green clothing
- Fill the frame—no gaps
02 · Light
Even out the green
Use soft, indirect light. Aim for a consistent shade of green with no dark patches.
- Light the screen separately from you
- Avoid harsh shadows on the backdrop
- Use lamps with white bulbs if needed
03 · Capture
Frame your shot
Position the camera at eye level. Keep everything you want to replace in front of the green.
- Shoot at the highest resolution you can
- Avoid fast camera moves at first
- Do a 5-second test clip
04 · Replace
Drop in your world
Use chroma key in your editor or meeting app to remove green and add your new background.
- Tweak tolerance until green disappears
- Add a soft shadow for realism
- Match background brightness to your lighting
Gear checklist
Everything you need to start (and what’s optional)
Start with the basics you already own, then upgrade as your projects grow. You can build a surprisingly good setup on a budget.
- Essential gear: what you absolutely need
- Nice-to-have upgrades for cleaner keys
- Software picks from free to pro-level
Pro tip: Invest first in lighting, not the most expensive camera. Light makes or breaks a green screen shot.
Must-have items
- Green screen backdrop (fabric, paper, or collapsible panel)
- Camera or smartphone with HD video
- 2–3 continuous lights or soft lamps
- Solid stand or tripod for camera
- Chroma key capable app (OBS, Zoom, Premiere, CapCut, etc.)
Nice-to-have upgrades
- LED panels with dimmers and softboxes
- Hair light to separate you from the background
- Higher-end camera or lens with wide aperture
- Premade background packs (offices, stages, sci‑fi)
- Sound treatment (mic + basic acoustic foam)
Upgrade one piece at a time. Your lighting and audio will deliver the biggest perceived jump in quality.
Where it shines
Business-ready and just-for-fun green screen ideas
Blend professional use cases with playful creativity. Once your setup is dialed in, switching between serious and silly is as easy as swapping a background.
Business & brand
- Film trainings with your slides over your shoulder
- Create product demos in sleek virtual showrooms
- Record webinars from a "studio" that matches your brand
- Use clean, on-brand backdrops for sales calls and pitches
Make every internal video and client touchpoint look intentional and on-brand.
Content & creators
- YouTube intros with dynamic motion backgrounds
- Gaming streams with clean cutouts of you over gameplay
- Course lessons filmed once with multiple themed sets
- Social clips that "teleport" you into news articles or websites
Use one small space to film a whole universe of looks for your channel.
Fun & storytelling
- Put your kids on the moon or inside their favorite game
- Film birthday or holiday messages from iconic locations
- Create short films with impossible sets on tiny budgets
- Make team photos that look like movie posters
Green screen is an excuse to play—your imagination is the only limit.
Workshop idea: Host a 60-minute "green screen jam" with your team or friends. Everyone records one serious clip and one ridiculous clip—you’ll learn fast and get usable footage.
Before & after
See what’s possible with the exact same raw footage
Every pair below uses the same shot captured in front of a green screen. The only difference is the background and a few simple lighting and color tweaks.
How to read these: Look first at the raw green screen, then notice how lighting, cropping, and backgrounds transform the feel of the scene.
Try replicating one of these pairings as a practice exercise with your own backdrop.
Remote call → Branded office
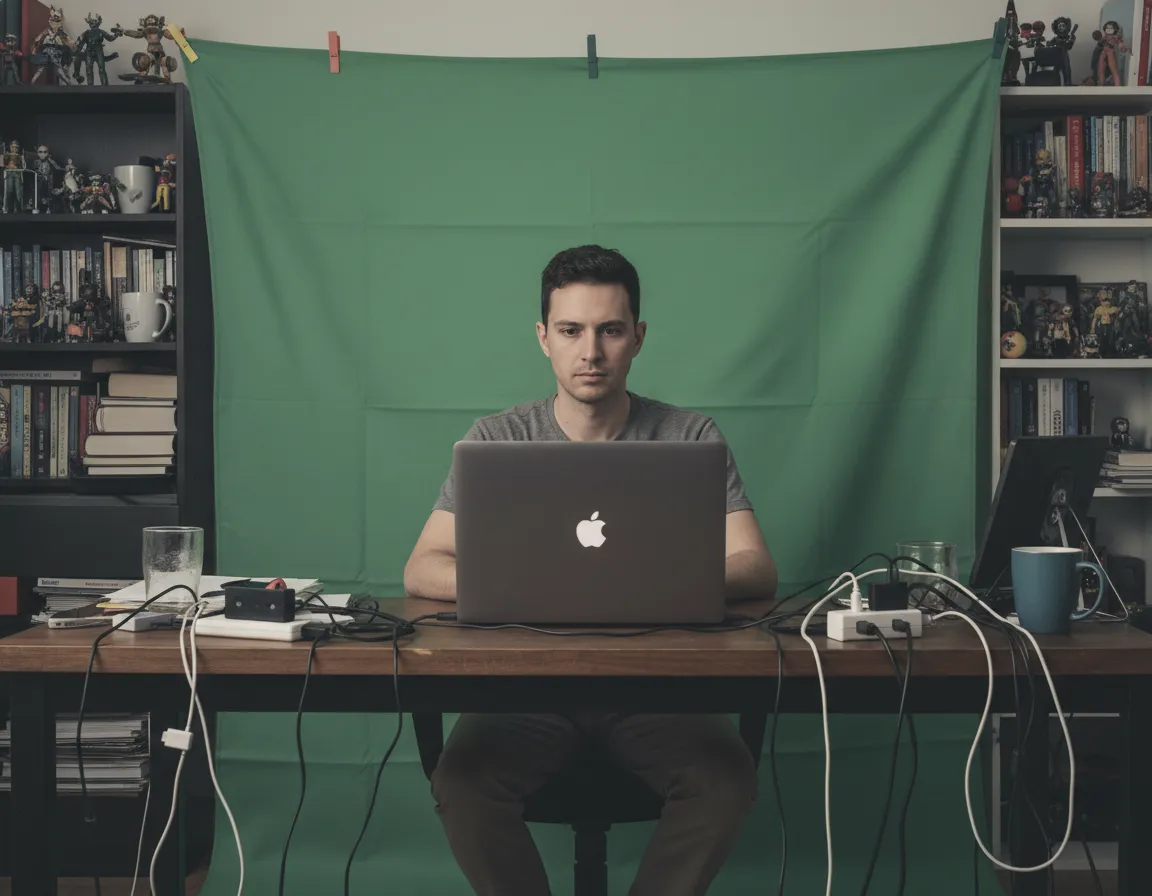
Before: plain room, cluttered shelves, cables in frame.

After: clean, on-brand office backdrop that matches slide colors.
Living room → YouTube studio
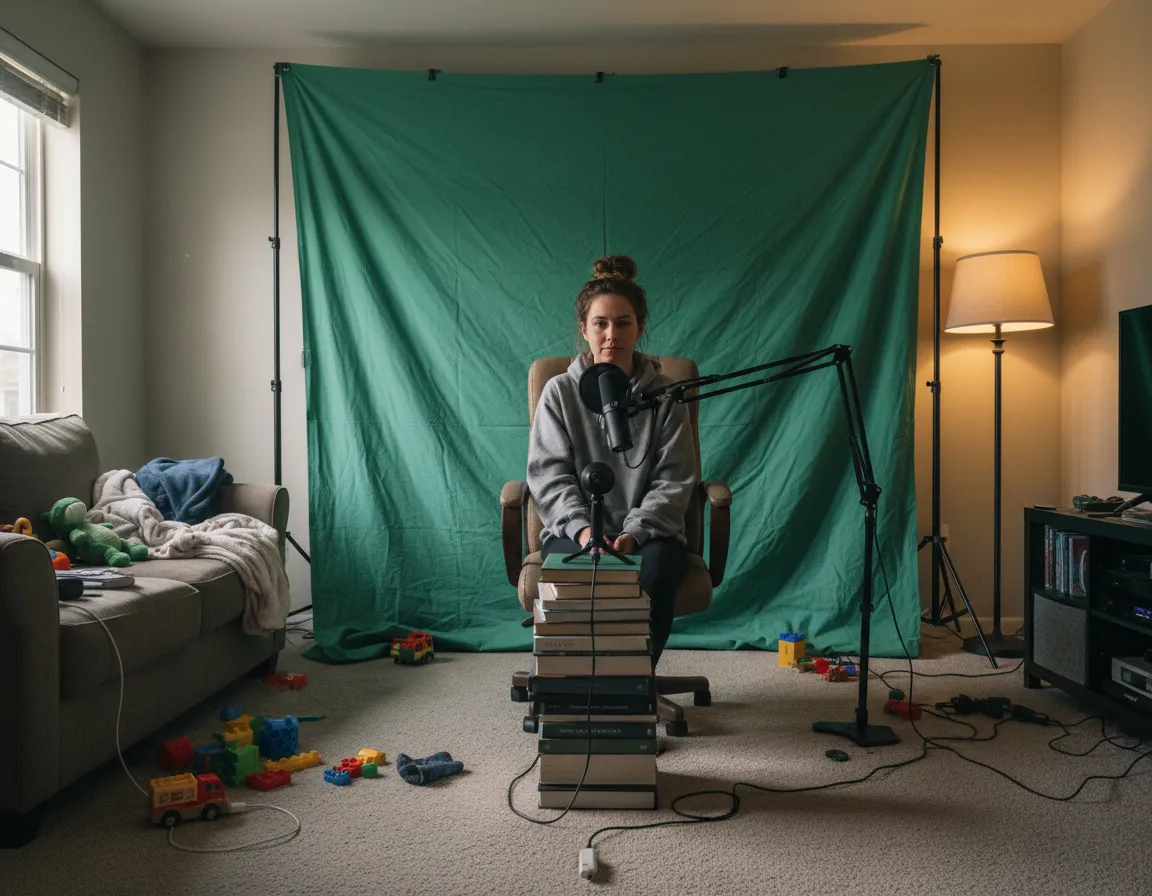
Before: mixed daylight, orange lamps, toys in the background.

After: cinematic studio look with branded overlays and neon accents.
Backyard → Fantasy world
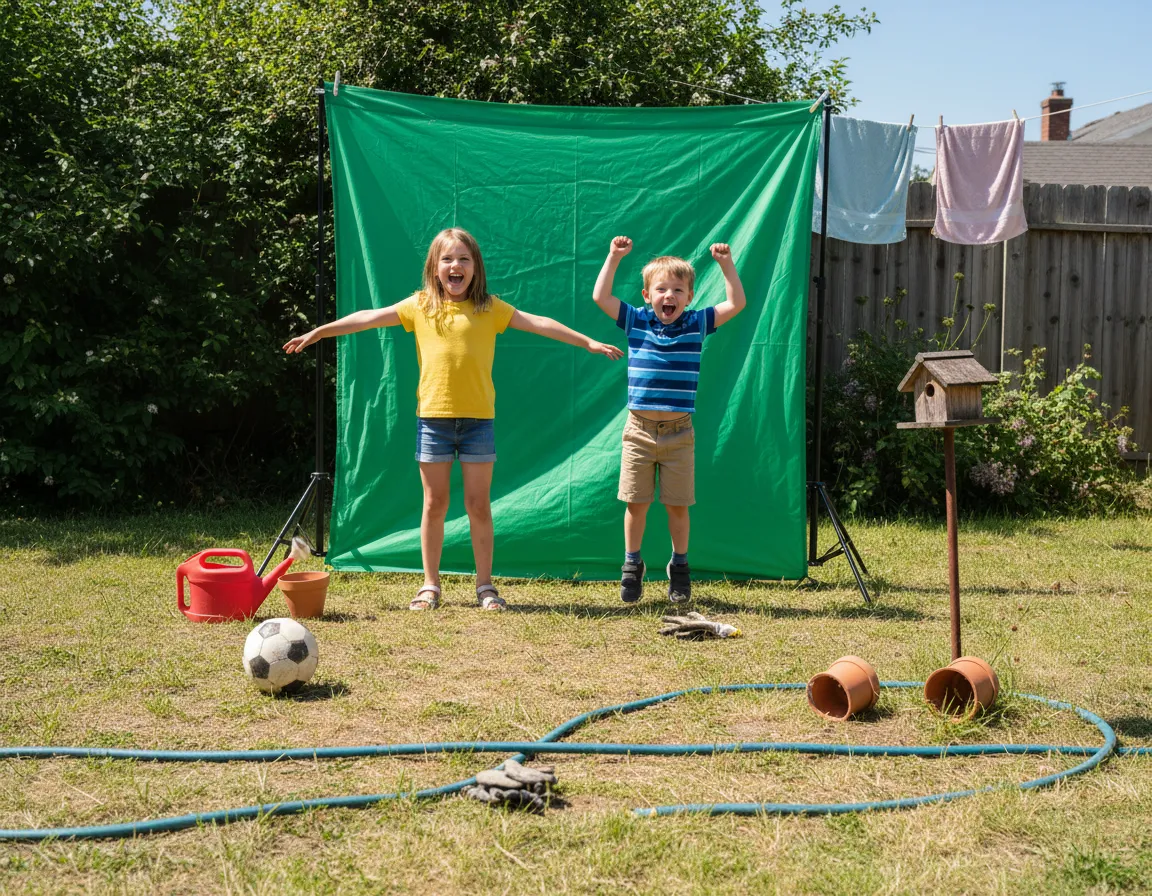
Before: midday sun, patchy grass, random objects behind the frame.

After: vibrant fantasy landscape with matching color grading and shadows.
Want a simple rule of thumb? If your before looks evenly lit and the green is smooth, your after can look like a movie poster with just a few clicks.
Quick answers before you roll camera
Do I really need a professional green screen kit?
No. Many people start with an inexpensive fabric backdrop or even a well‑lit green wall. The key is consistent lighting, distance between you and the screen, and avoiding green clothing.
Will this work in live meetings (Zoom, Teams, Meet)?
Yes. Most major meeting tools offer virtual backgrounds. With a green screen and decent lighting, your outline will be cleaner and you can use branded backdrops, offices, or subtle gradients instead of stock photos.
What if my lighting or background isn’t perfect?
Aim for progress, not perfection. Start with a simple setup, do a 30‑second test clip, and adjust one variable at a time—distance, brightness, or camera position. Even an imperfect key usually looks much better than a messy real‑world backdrop.
Can I do this entirely on my phone?
Yes. Many mobile apps (CapCut, VN, KineMaster, and others) support chroma key. You can shoot on your phone, key out the green, and export ready‑to‑share clips without touching a computer.
Ready to try it right now?
Here’s a 10‑minute starter challenge:
- Hang anything green (sheet, paper, backdrop) behind you
- Place a lamp so your backdrop is evenly lit
- Record a 20‑second clip introducing yourself
- Drop it into a chroma key app and swap the background
Once you’ve done that once, you’ll understand the whole green screen pipeline—and you can keep iterating toward pro results.
Come back to this page whenever you’re ready to upgrade lighting, gear, or creative ideas.
Green Screen Playbook · ChromaKey in Action
Built for creators, teams, and anyone who wants their videos to look like they belong on the big screen.